Étape 1
Installe l’application – recherche « Red Bull MOBILE Data » dans Google Play
OU scannez le code QR

OU Va sur : https://esim.redbullmobile.com/ et clique sur l’icône Google Play
Étape 2
Ouvrez l’application
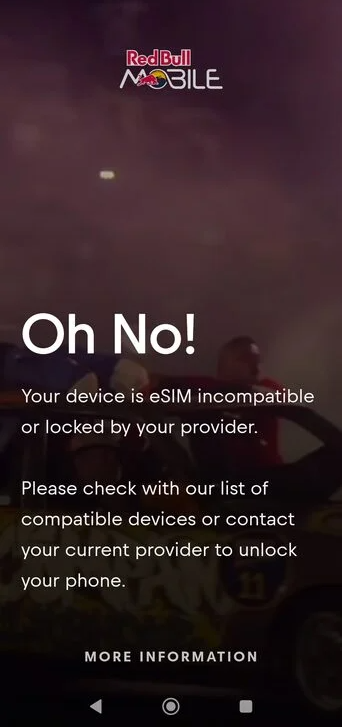
Si l’écran « Oh No ! » s’affiche, contacte ton opérateur de téléphonie mobile en lui communiquant ton IMEI pour déverrouiller ton appareil
Sinon, passez à l’étape 3
Étape 3
Cliquez sur « Besoin d’un compte » si vous souhaitez créer un compte à l’aide de votre adresse électronique.
OU
Appuie sur « Continuer avec Google » pour une connexion rapide
Étape 4
Entre ton nom, ton e-mail et ton mot de passe
OU
Appuie sur « Continuer avec Google » pour une connexion rapide.
Passe à l’étape 6 si tu as utilisé « Connexion avec Google » ; sinon, passe à l’étape 5.
Étape 5
Une fois que vous avez vérifié votre adresse électronique, vous serez redirigé vers l’écran de connexion.
Étape 6
Appuyez sur « Démarrer maintenant »
Étape 7
Cliquez sur « Activer eSIM »
Étape 8
Cliquez sur « + » pour ajouter une eSIM.
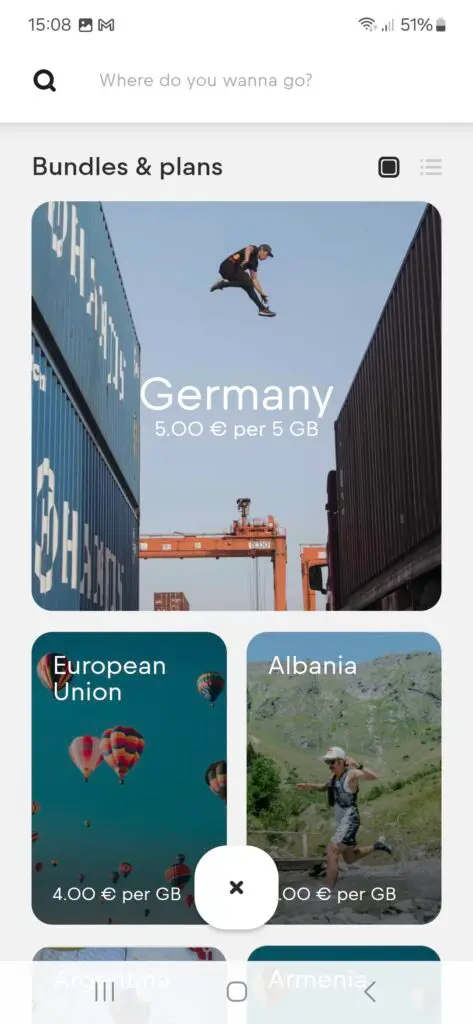
Étape 9
Choisissez votre plan
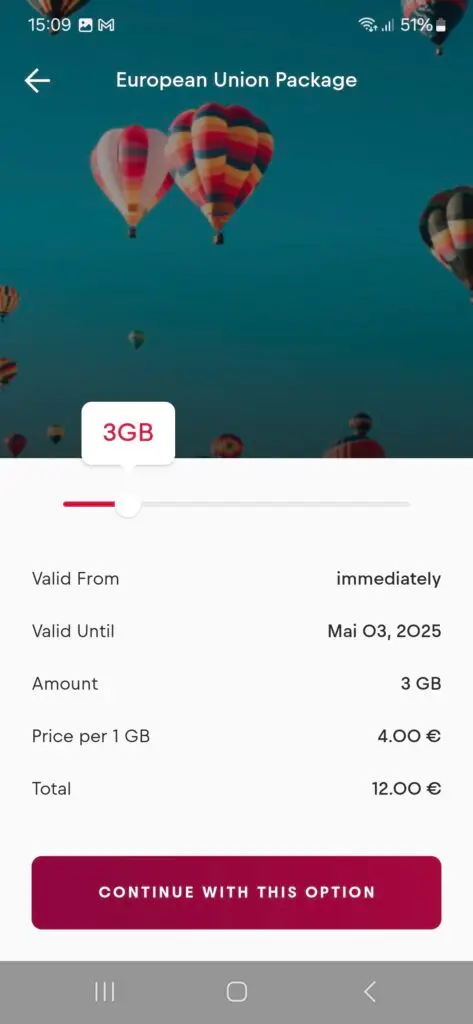
Étape 10
Utilisez le curseur pour sélectionner la taille de votre plan de données, puis cliquez sur « Continuer avec cette option ».
Étape 11
Choisis ton option de paiement

Étape 12
Clique sur « CLOSE » pour terminer la configuration.
Étape 13
Sous « Plans de données », vous verrez tous vos forfaits actifs.
Votre installation est maintenant terminée.
